Mobile-application-development-with-Python
Android and iOS
Project maintained by AhmetFurkanDEMIR Hosted on GitHub Pages — Theme by mattgraham
Hello, in this article, we will learn how to develop mobile applications with Python. We will write an application with Python (Toga), then we will run these codes with BeeWare on Android and iOS devices.
First of all, what is Python ?, let’s find out :).
Python
![]()
Python is an interpreted, high-level and general-purpose programming language. Python’s design philosophy emphasizes code readability with its notable use of significant whitespace. Its language constructs and object-oriented approach aim to help programmers write clear, logical code for small and large-scale projects.
Python is dynamically typed and garbage-collected. It supports multiple programming paradigms, including structured (particularly, procedural), object-oriented, and functional programming. Python is often described as a “batteries included” language due to its comprehensive standard library. Python documentation : Click
Now let’s meet the Python module Toga.
Toga

Toga is a Python native, OS native, cross platform GUI toolkit. Toga consists of a library of base components with a shared interface to simplify platform-agnostic GUI development.
Toga is available on Mac OS, Windows, Linux (GTK), and mobile platforms such as Android and iOS. Toga documentation : Click
How are we going to distribute the code we wrote with Python (Toga) and learn what BeeWare is.
BeeWare
BeeWare : Write once, Deploy everywhere. Write your apps in Python and release them on iOS, Android, Windows, MacOS, Linux, Web, and tvOS using rich, native user interfaces. Multiple apps, one codebase, with a fully native user experience on every platform.
Python Ui modules that BeeWare can distribute.
1-) Toga
2-) PySide2
3-) PursuedPyBear
4-) None
With the BeeWare module, we will run our Python(Toga) codes on mobile devices. BeeWare documentation : Click
What are Android and iOS ?, let’s find out :).
Android and iOS

-
Android : Android is a mobile operating system based on a modified version of the Linux kernel and other open source software, designed primarily for touchscreen mobile devices such as smartphones and tablets. Android is developed by a consortium of developers known as the Open Handset Alliance and commercially sponsored by Google. It was unveiled in November 2007, with the first commercial Android device launched in September 2008. Android : Click
-
iOS : iOS (formerly iPhone OS) is a mobile operating system created and developed by Apple Inc. exclusively for its hardware. It is the operating system that powers many of the company’s mobile devices, including the iPhone and iPod Touch; the term also included the versions running on iPads until the name iPadOS was introduced with version 13 in 2019. It is the world’s second-most widely installed mobile operating system, after Android. It is the basis for three other operating systems made by Apple: iPadOS, tvOS, and watchOS. It is proprietary software, although some parts of it are open source under the Apple Public Source License and other licenses. iOS : Click
Now that we’ve learned everything, it’s time to test what we’ve learned with an example.
Creating a project
First, let’s set up the “briefcase” and “Toga” and create a study.
Install the BeeWare and Toga tools
python3 -m pip install briefcase
pip3 install beeware
pip3 install briefcase
pip3 install toga
Bootstrap a new project
briefcase new
Briefcase will ask us for some details of our new application. For the purposes of this tutorial, use the following:
- Formal Name - Accept the default value: Hello World.
- App Name - Accept the default value: helloworld.
- Bundle - If you own your own domain, enter that domain in reversed order. (For example, if you own the domain “cupcakes.com”, enter com.cupcakes as the bundle). If you don’t own your own domain, accept the default bundle (com.example).
- Project Name - Accept the default value: Hello World.
- Description - Accept the default value (or, if you want to be really creative, come up with your own description!)
- Author - Enter your own name here.
- Author’s email - Enter your own email address. This will be used in the configuration file, in help text, and anywhere that an email is required when submitting the app to an app store.
- URL - The URL of the landing page for your application. Again, if you own your own domain, enter a URL at that domain (including the https://). Otherwise, just accept the default URL (https://example.com/helloworld). This URL doesn’t need to actually exist (for now); it will only be used if you publish your application to an app store.
- License - Accept the default license (BSD). This won’t affect anything about the operation of the tutorial, though - so if you have particularly strong feelings about license choice, feel free to choose another license.
- GUI framework - Accept the default option, Toga (BeeWare’s own GUI toolkit).
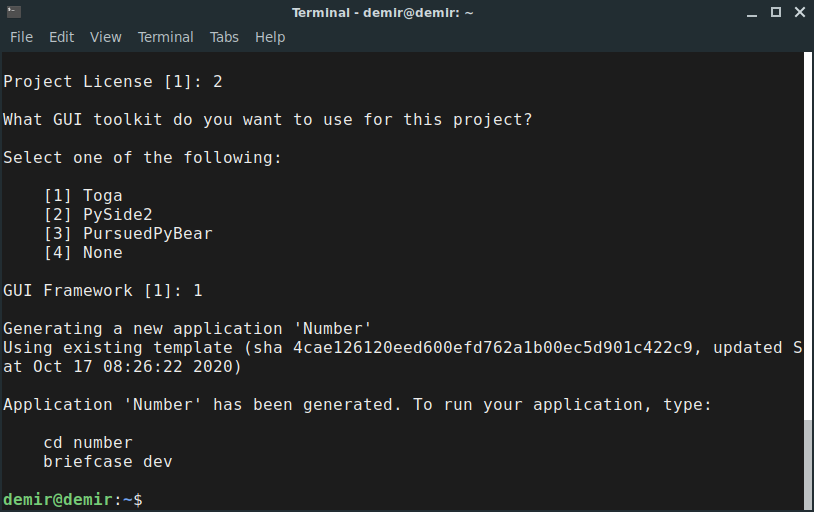 (Creating a new project)
I move to the directory of my project with the “cd number” command.
Our sample application and its codes
As an example, we will inform the user about the properties of the number received from the user. We will write our codes in the script named “app.py” in the “src” folder in the project directory.
# Our application codes, I will paste these codes into the python script named "app.py".

import toga
from toga.style.pack import *

def Operation(number):

    iff = []
    number = int(number)

    if number%2==0:

        iff.append("Cift")

    else:

        iff.append("Tek")

    if number==0:

        iff.append("sayi=0")
        iff.append("Asal degil")


    elif number<0:

        iff.append("sayi<0")
        iff.append("Asal degil")

    else:

        iff.append("sayi>0")

        kn = 0
        for i in range(2,number):

            if number%i==0:

                kn=1
                break

        if kn==1:

            iff.append("Asal degil")

        else:

            if number==1:

                iff.append("Asal degil")

            iff.append("Asal")

    return iff


def build(app):

    box = toga.Box()

    name_label = toga.Label('Sayi : ', style=Pack(text_align=LEFT))
    name_input = toga.TextInput()

    run_label = toga.Label("", style=Pack(text_align=LEFT))
    run_label_1 = toga.Label("", style=Pack(text_align=LEFT))
    run_label_2 = toga.Label("", style=Pack(text_align=LEFT))

    def button(widget):

        iff = Operation(name_input.value)

        stra = "1-) " + iff[0]
        strb = "2-) " + iff[1]
        strc = "3-) " + iff[2]

        run_label.text = stra
        run_label_1.text = strb
        run_label_2.text = strc

    button = toga.Button('Run', on_press=button)
    button.style.padding = 20
    button.style.flex = 20

    name_label.style.update(width=100, padding_left=10)
    name_input.style.update(width=100, padding_top=10, padding_left=10)

    run_label.style.update(width=100, padding_top=10, padding_left=10)
    run_label_1.style.update(width=100, padding_top=10, padding_left=10)
    run_label_2.style.update(width=100, padding_top=10, padding_left=10)

    box.add(name_label)
    box.add(name_input)

    box.add(run_label)
    box.add(run_label_1)
    box.add(run_label_2)
    box.add(button)

    box.style.update(direction=COLUMN, width=100, padding_top=10)
    return box

def main():
   return toga.App('Number', 'org.pybee.salute', startup=build)

if __name__ == '__main__':
   main().main_loop()
To run and test these codes on the desktop, simply run the following code.
briefcase dev
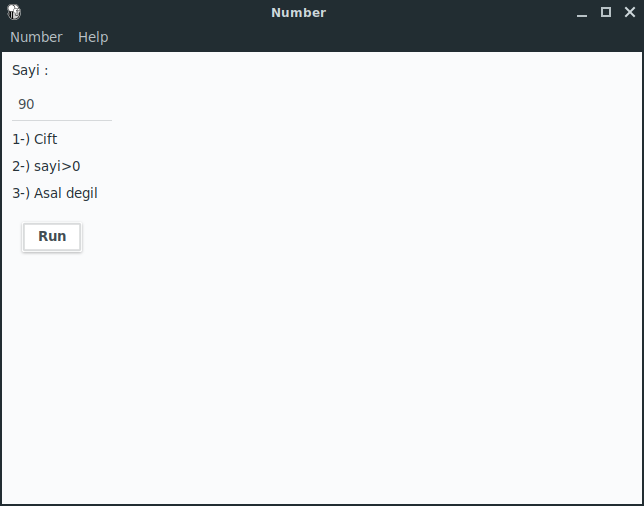 (Desktop output)
Compiling your code for Android, and testing it in the android emulator
Taking it mobile: Android
Now, we’re going to take our application, and deploy it as an Android application. The process of deploying an application to Android is very similar to the process for deploying as a desktop application. Briefcase handles installing dependencies for Android, including the Android SDK, the Android emulator, and a Java compiler.
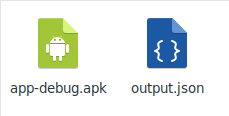
Create an Android app and compile it, First, run the create command. This downloads an Android app template and adds your Python code to it.
briefcase create android
When you run briefcase create android for the first time, Briefcase downloads a Java JDK, and the Android SDK. File sizes and download times can be considerable; this may take a while (10 minutes or longer, depending on the speed of your Internet connection). When the download has completed, you will be prompted to accept Google’s Android SDK license.
Once this completes, we’ll now have an android directory in our project. This directory will contain a Hello World folder, which will contain an Android project with a Gradle build configuration. This project will contain your application code, and a support package containing the Python interpreter.
We can then use Briefcase’s build command to compile this into an Android APK app file.
briefcase build android
Run the app on a virtual device
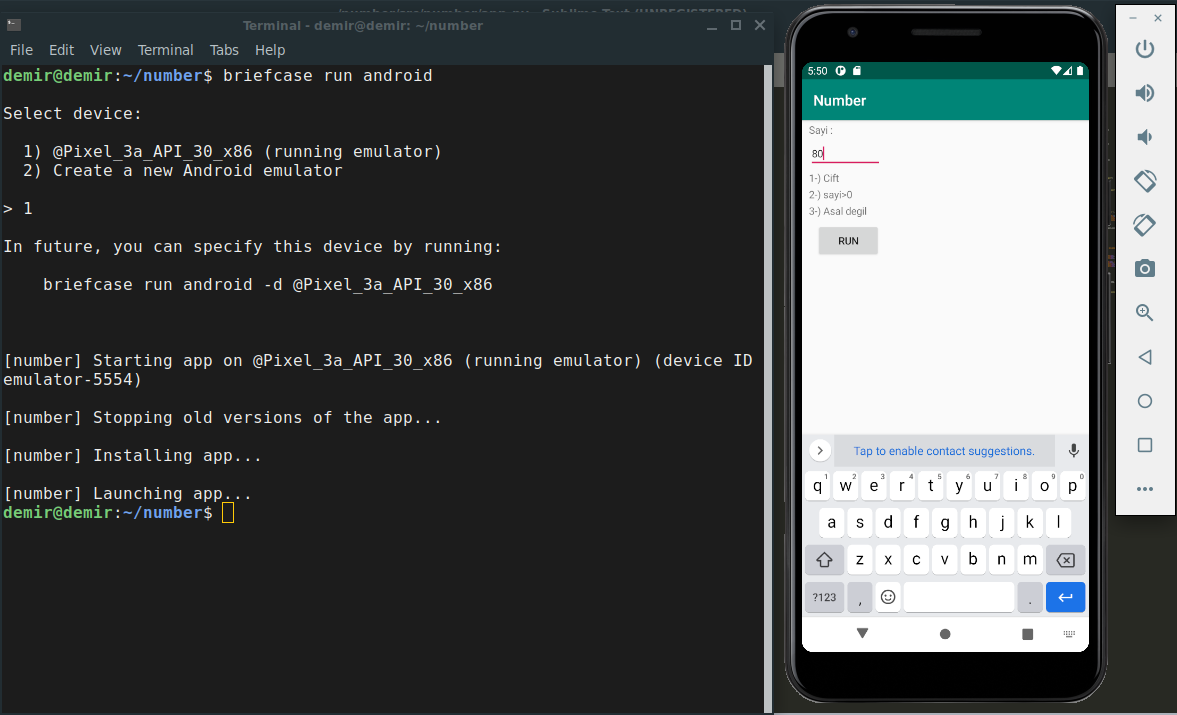
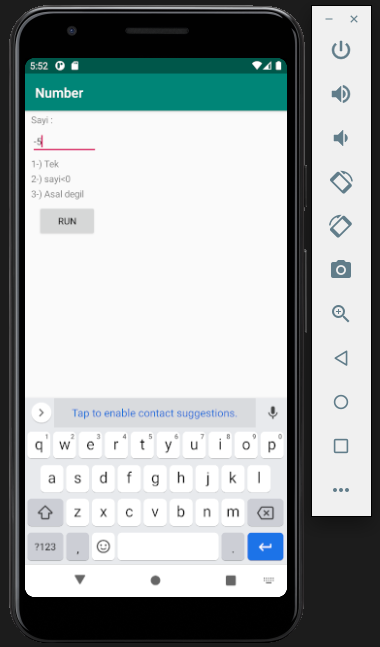
We’re now ready to run our application. You can use Briefcase’s run command to run the app on an Android device. Let’s start by running on an Android emulator.
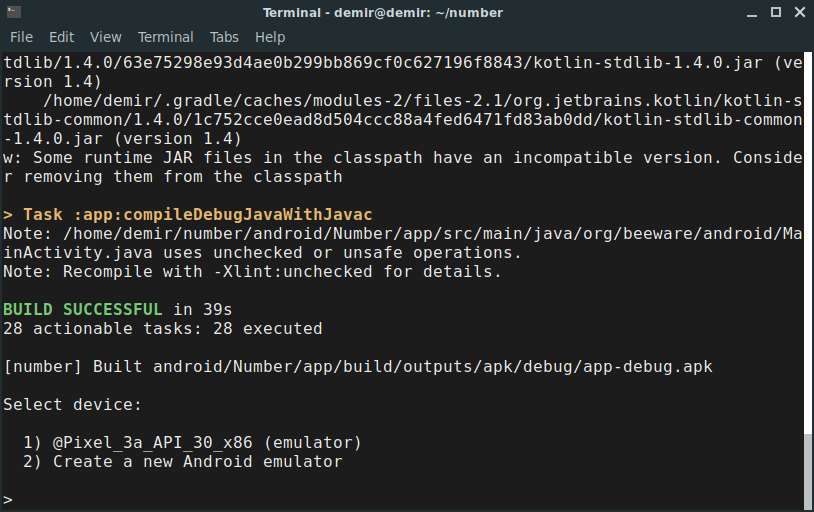
To run your application, run briefcase run android. When you do this, you’ll be prompted with a list of devices that you could run the app on. The last item will always be an option to create a new Android emulator.
briefcase run android
Compiling the Python codes we have written for iOS platforms with Xcode.
Now, we’re going to take our application, and deploy it as an iOS application.
The process of deploying an application to iOS is very similar to the process for deploying as a desktop application. First, you run the create command - but this time, we specify that we want to create an iOS application:
briefcase create iOS
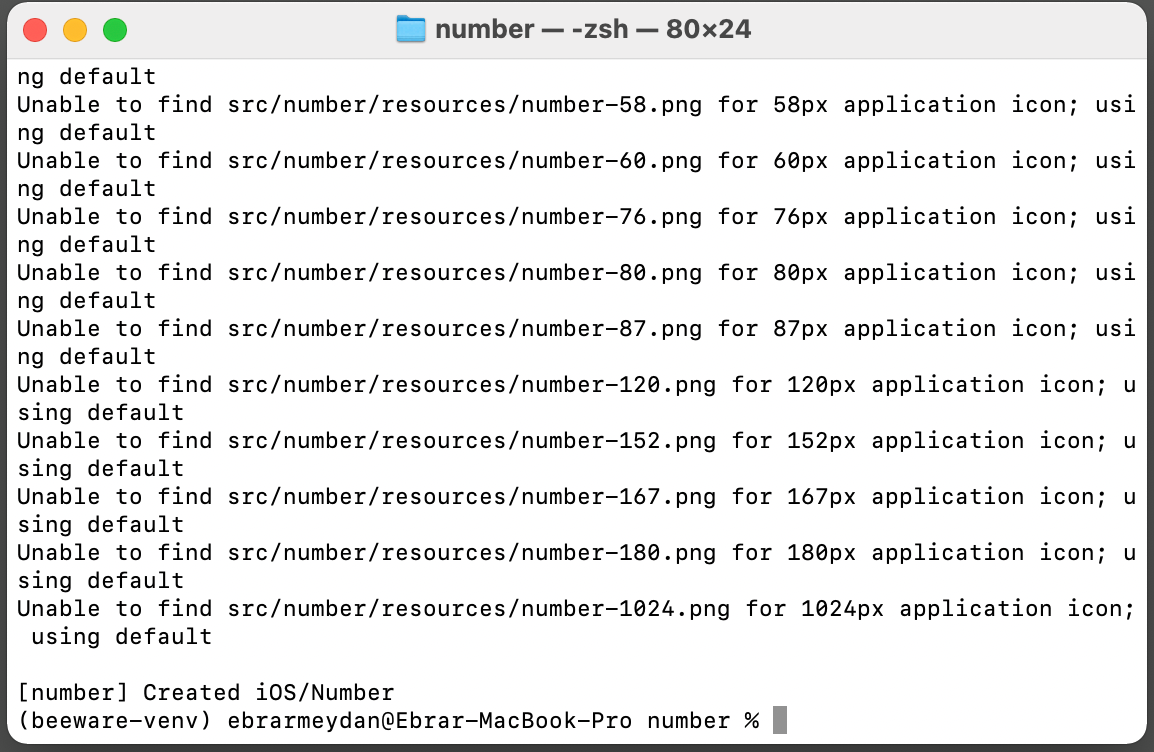
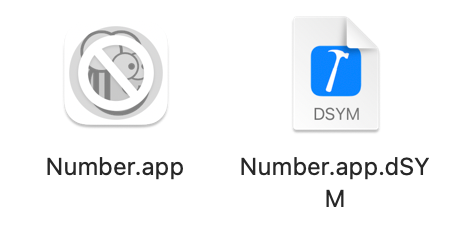
Once this completes, we’ll now have an iOS directory in your project. This directory will contain a “number” folder, which will contain an Xcode project, as well as the support libraries and the application code needed for the application.
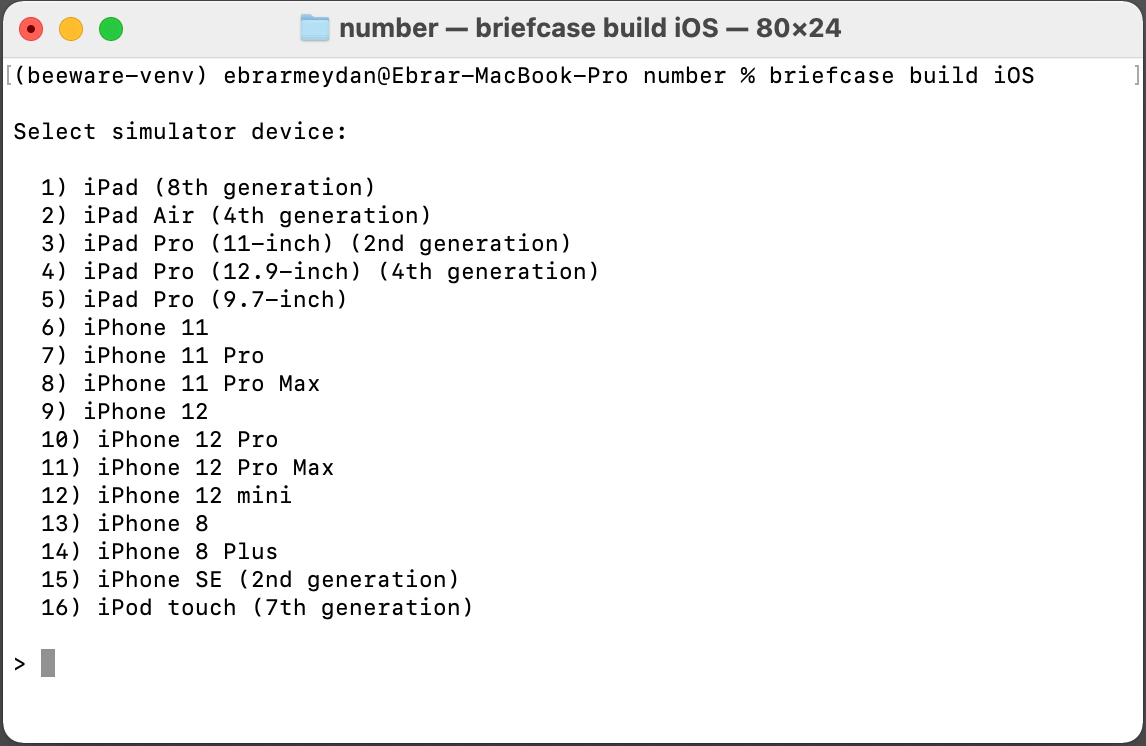
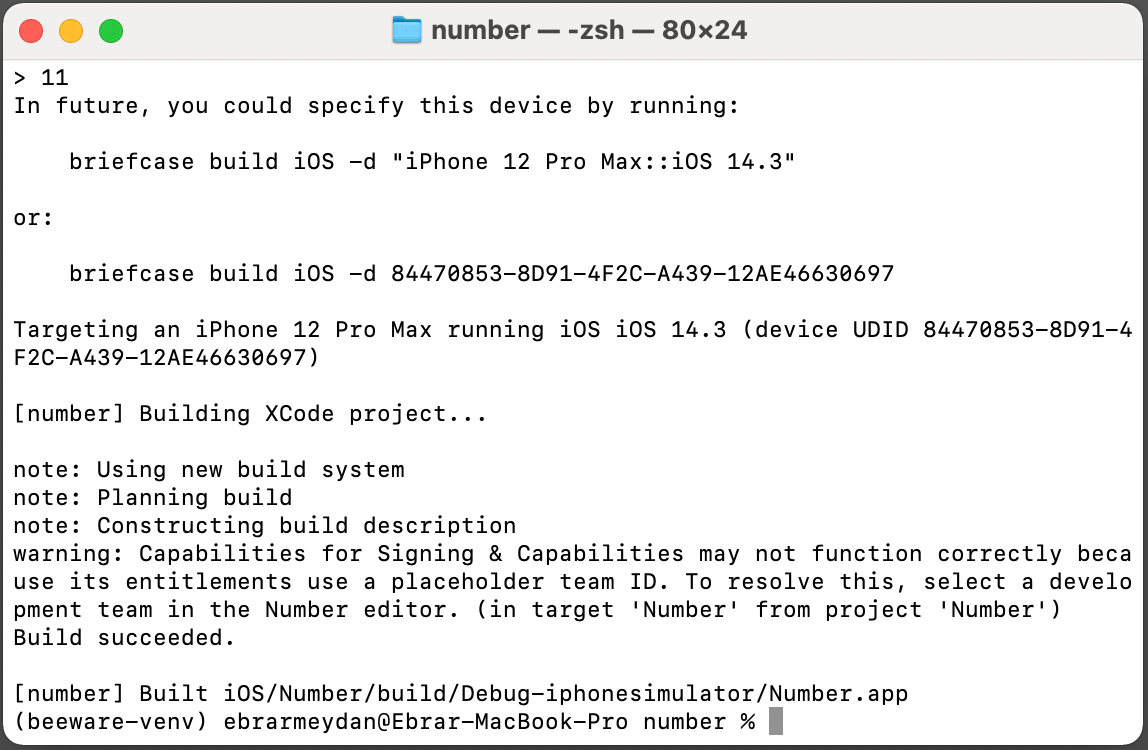
You can then use Briefcase to compile your app using the build command. You’ll be prompted to select a device to compile for; if you’ve got simulators for multiple iOS versions installed, you may also be asked which iOS version you want to target. The options you are shown may differ from the options show in this output; for our purposes, it doesn’t matter which simulator you pick.
briefcase build iOS
We’re now ready to run our application. You could do this by running briefcase run iOS. If you run Briefcase in that way, you’ll be asked again for the device you want to target. If you already know the devices that are available, you can tell briefcase to use that simulator by providing a -d (or –device) option. Using the name of the device you selected when you built your application, run:
briefcase run iOS -d "iPhone 11"
If you have multiple iPhone 11 simulators, briefcase will pick the highest iOS version; if you want to pick a particular iOS version, you tell it to use that specific version:
briefcase run iOS -d "iPhone 11::13.3"
Or, you can name a specific device UDID:
briefcase run iOS -d 4768AA69-497B-4B37-BD0C-3961756C38AC
This will start the iOS simulator, install your app, and start it. You should see the simulator start, and eventually open your iOS application:
Result
We wrote an application with Python (Toga), then ran these codes with BeeWare on Android and iOS devices. In the mobile space, I recommend Flutter, Kotlin, Swift and objective c programming languages instead of Python.